Before this, Read : Creating your WebView App : Part 3
This is the last part for our android application for the website.
Open AndroidManifest.xml from app>>manifests>>AndroidManifests.xml
In the AndroidManifest.xml, Delete everything except the first three lines. The screenshot of mine is given below.

Now paste the below code after the three lines
Now, we have to change the Launcher icon for your app to be shown in the device.
Next, we have to create apk file for your android app. for instructions for that, click here
Thats it. Now your android app for your website is ready.
You can either share the apk or post it in the google play store to earn money from your android app.
If you have any doubts regarding the entire process, you are always welcome to use the below comments section...
Good Luck.
This is the last part for our android application for the website.
Open AndroidManifest.xml from app>>manifests>>AndroidManifests.xml
In the AndroidManifest.xml, Delete everything except the first three lines. The screenshot of mine is given below.

Now paste the below code after the three lines
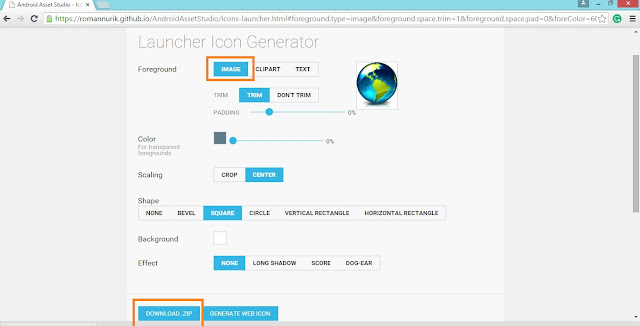
Now, we have to change the Launcher icon for your app to be shown in the device.
- For that Go to https://romannurik.github.io/AndroidAssetStudio/icons-launcher.html
- Click on IMAGE, and select the image for the icon

- From the bottom of screen select Download ZIP
- Now, Extract the downloaded ZIP and Go to your project folder. (Normally C:\Users\username\AndroidStudioProjects\App_name\app\src\main\res)
- Paste the images from mipmap folder in the extracted ZIP to the drawable folders
Next, we have to create apk file for your android app. for instructions for that, click here
Thats it. Now your android app for your website is ready.
You can either share the apk or post it in the google play store to earn money from your android app.
If you have any doubts regarding the entire process, you are always welcome to use the below comments section...
Good Luck.
0 comments:
Post a Comment